Wednesday 6 June 2012

Down to the Nitty Gritty

I squealed when I tasted this. It was that good. Actually squealed.
Awkward.
There may have also been a little jumping up and down and some frantic mild clapping 
I have this thing where I hate wasting food. So when I was trying to figure out what to have for dinner today I was inspired by using up some food I never thought I was going to eat. When my roommates moved out one girl forgot an opened taco kit here. It came with hard taco shells, taco seasoning and a special sauce. I am not a fan of soy meat crumbles (made to resemble ground beef) and so I thought the hope of using the seasoning and sauce was lost. The shells on the other hand were already multipurposed for me to shovel in snack on guacamole one night. 


A few days ago I was reading Hungry Hungry Hippie when I saw she made cornmeal grits and I couldn't get them out of my mind! I looked in my fridge and noticed some vegetables that were on their last legs. I initially thoughts about making a tex-mex wrap with the idea of Taco-cheeze grits sprung into my mind. 
Let me say I think this would definitely benefit from some avocados, I just couldn't bear to drag my lazy butt to the store.


Sidenote: my dessert for this dinner were some blueberries and a black bean brownie. These brownies were to die for. 
Photo proof. 


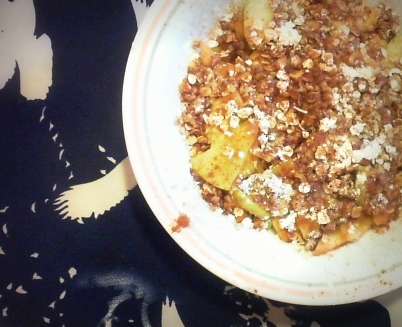
Tex-Mex Waste-Not Bowl
Serves 2
Grits inspired by Hungry Hungry Hippie

1 small yellow onion, thinly sliced
1 small orange pepper, thinly sliced
4 button mushrooms, thinly sliced
1 cob of corn, kernels removed

3/4 cup cornmeal
1 1/2 cup soy milk
1 teaspoon nutritional yeast
1 teaspoon taco seasoning
1/2 teaspoon salt

1 medium tomato chopped

Taco sauce for drizzling

Start by cooking the onion and pepper in a frying pan on medium heat. Cook for about 5 minutes until soft. Add the mushrooms and corn and cook an additional 5-7 minutes until veggies are soft and browned. Stir in the tomato in the last minute

Meanwhile combine the milk, cornmeal, nutritional yeast, taco seasoning and salt in a small saucepan. Cook over medium-high heat until cornmeal starts to thicken. Remove from the heat soon after. I left mine on too long and they were a bit solid towards the end of my meal.

Spoon the grits in the bottom of two bowls and top each with the veggies. I drizzled taco sauce over mine cause I had it. You could use salsa or hot sauce too!

I highly recommend eating this with a brownie and a tall glass of Arizona iced tea, drank out of a wineglass of course. 

Friday 1 June 2012

Sweet Twist on an Indian Classic

Last week when I was at home visiting my parents I dragged my Mom to Chapters to look at cookbooks. This is nothing new to her, as I am a bit of a cookbook freak. After almost an hour of looking through every vegan cookbook there I finally decided on one.


This was definitely a good thing, I am pretty sure my mom may have left me in the store if I made her look any longer.


I decided on Vegan Planet by Robin Robertson. This cookbook has 400 recipes from a variety of cultural backgrounds. It is divided up into comprehensive sections, provides suggestions for menu plans and most of the recipes have short ingredients lists. 


Alas, I was not able to try any of the delicious looking recipes until today! With the crummy weather I decided I wanted something hearty and satisfying, but wasn't really in the mood for soup or pasta. While looking through the pages I had flagged I noticed I had all the ingredients on hand for the Baked Sweet Potato and Green Pea Samosas. I love new twists on classic foods so I was up to the challenge. I ended up making a few changes to the recipe from the book to suit my personal tastes and was really happy with the flavour. 


I did however run into a couple problems with this recipe.The amount of dough was not even close to enough for how much filling there was (I have doubled the amount in the recipe below) and the filling was a bit dry (I added water). I didn't have high hopes as I popped these into the oven but decided to take my chances anyways. 


They ended up being delicious! The outside was crispy and crunchy - especially shocking since they were baked! The filling was spicy and very flavorful. 


You will learn as I post more recipes that I have a serious addiction to barbecue sauce. I put it on pretty much anything and everything I can. Naturally I had to try these babies dipped in the sauce, it may not be traditional, but damn was it ever tasty. 


Baked SP & P Samosas
Serves 4

Adapted from Baked Sweet Potato and Green Pea Samosas 
from Vegan Plant

2 cups of unbleached white flour
1/2 cup of water
1 tablespoon vegetable oil

1 large sweet potato washed and cut into quarter inch cubes

1 medium sized cooking onion finely diced
1 tablespoon of vegetable oil

Heaping 1/2 cup of frozen peas
1 tablespoon garlic, minced (1 small and 1 large clove)
1/2 a teaspoon cayenne pepper (or less if you are a spice weenie)
1 teaspoon ground cumin
1 teaspoon curry powder
1 tablespoon water, as needed

Cooking spray


Start by mixing the first 3 ingredients to form a dough. After creating a dough let this sit for half an hour.

While the dough is resting steam the chopped sweet potato until it is tender. I used this handy little guy, but you could use a steamer basket. This is also a good time to preheat your oven to 375 degrees.

 Heat the remaining tablespoon of oil in a large frying pan on medium heat. Add the onion and cook for a five to seven minutes, until the onion is soft and a bit brown. Next add the peas, garlic, spices and sweet potato to the frying pan and cook until the vegetables are soft and a bit browned. If you are worried the filling is a bit dry add a tablespoon of water. Mash the sweet potatoes a little with the back of the spoon you are using to stir the mixture. You want the potatoes to be a bit mushed, but this is not mashed potatoes! They should still hold their shape. Set this mixture aside.

Flour your counter top and roll out the dough so it is no more than half a centimeter thick. Cut the dough into 16 even triangles. Spoon a bit of the filling into each samosa and fold it in half so that it looks like a triangle. Use water to seal the edges if necessary (mine stuck just by pinching them).

Spray a cookie sheet with cooking spray and place the samosas on it. Lightly spray the tops of the samosas with the oil as well. 

Cook for 20 minutes.


Thursday 17 May 2012

Easy as Apple Crisp

Saying I like desserts is kind of like saying
Babe Ruth was okay at baseball...
Yogi Bear thinks picnic baskets are alright...
Diane Ross's hair has a bit of a wave to it...


You catch my drift.

I have somewhat of a love affair with sweet things and love even more so when I don't have to feel totally guilty for indulging every once in a while. Today was just one of those crazy days that by the end I needed a little pick-me-up. I was also completely pooped and didn't feel like baking cookies, brownies or cupcakes (the usual suspects). I did however have an apple leftover from my lunch and a craving for something cinnamon-y and sweet.  

Enter my microwave.

Not wanting to wait more than 10 minutes for a sweet treat I decided I would attempt to make the quickest apple crisp possible.


To my surprise it turned out AMAZING! I have to confess: I didn't have such high hopes for this recipe. Soft apples, a not-so-sweet topping with a crunchy texture? In the microwave?

Was I crazy?

NOPE!!!
Microwave Apple Crisp
One Generous Serving

1 Crispin/ Mutsu Apple, thinly sliced
1teaspoon of water

2 tablespoons quick-cook oats
1 tablespoon brown sugar
1 tablespoon whole-wheat pastry flour
1/4 teaspoon cinnamon
pinch of salt

1 tablespoon vegan margarine


Place the thinly sliced apple in a bowl and pour the water over top. 

Mix the oats, brown sugar, flour, cinnamon and salt in a bowl. Add the margarine and mix together with a spoon until well combined. Spread over the apples.

Cover the bowl with saran wrap and microwave for one minute. 
Uncover the bowl and microwave for an additional 30 seconds.

Top apple crisp with any fancy things you would like or just serve it plain. I sprinkled mine with cinnamon and powdered sugar.

Good Snack?


Oh yeah. 


Wednesday 16 May 2012

Irish I had Some Soda Bread

It all started this past February when I was cruising facebook and saw a link posted by one of my favourite restaurants.  It sent me to an article about how this restaurant's owner would be entering St Catharine's Downtown Chili Cook off. I was so excited that there would be a vegan option at this event! I knew as soon as I saw the article I had to rally my friends to go.
Me and some friends at the Cook off
From Left to Right: Andrea, Me (eating a piece of the delicious bread) Sam and Melinda
Fast-forward to the Cook off me and a bunch of friends went and taste tested as many chili's as possible. Unfortunately there were only two vegetarian chili's at this event, but they were both amazing! My vegetarian friend and I used up all our sample tickets on these vendors and to get a pieces of bread from some of the non-vegan chili booths. At one of the vendors there was Irish soda bread accompanying their chili. After trying this bread I knew I needed to make my own at home right away! 
After a few test loaves I came up with a recipe that turned out even better than the original bread I had had at the Cook off! I  have made this bread several time since for my friends and family and they have all loved it! Feel free to improvise with the add-in's. I am thinking of trying a cinnamon raisin version next!
Irish Soda Bread
Makes One Large Loaf

1 1/2 cup plain soy milk *
1 1/2 tablespoons lemon juice

2 cups unbleached white flour
1 cup whole wheat flour
1 1/2 teaspoons baking soda
1 1/2 teaspoons salt
1/4 cup add-ins 
In these pictures I used sunflower seeds in the bread and pressed a few pumpkin seeds on top and sprinkled the loaf with kosher salt. 
I have also used currants, raisins and even added in a tablespoon of herb and garlic seasoning. Get creative!

Start by preheating the oven to 375 degrees.

Whisk the soy milk and lemon juice together and let sit and curdle for 10 minutes.

Mix the flour, baking soda and salt together in a bowl and make a well in the centre.

Slowly add the milk in 3 equal parts and mix with a fork or spoon after each add. Once all the liquid is combined and has formed a dough remove it from the bowl and place it on a floured cutting board. Knead the dough for approximately one minute.

Knead in the add-in of choice and form the bread into a round disk. Score two 2.5-centimeter deep cuts into the bread so they form an X shape.

Place loaf on a floured baking sheet and bake it for approximately 35-40 minutes. You will be able to tell if it is done by picking up the loaf and tapping on the bottom. If it sounds hollow it is finished.

Serve with jam, natural peanut butter or vegan margarine

The real kicker of the cook off? The vegan chili took home first place :)

* As I am allergic to almonds I haven't tried almond milk with the recipe. I have tried soy and rice milk and this recipe and both turned out well. My family preferred the bread made with rice milk and I preferred the bread made with soy. 

Tuesday 15 May 2012

Koo-koo for Coconut Milk

Isn't everything better with coconut milk?

Unless you are one of those crazy people who doesn't seem to like coconut. I just don't understand it! What isn't to like about a smooth, rich, creamy deliciously flavored thing?! 

I am not considered one of these crazy people. As a result of this love affair I have a way of putting it in absolutely everything I can think of sneaking it into things from time to time. So today when I was looking through some recipes on the Tasty Kitchen I was inspired to make dal. I based my recipe loosely on this one and turned into more of a complete dish. I planned to make this recipe as it was written until I opened up my fridge and saw an almost expired carton of coconut milk; how this got even close to expiry in my house is beyond me. Seeing this option completely changed my game plan. 

The result ended up being a delicious healthy meal... that kind of looked like barf.
No one said good food always looks good.

Coconut Cumin Dal
Serves 4 (or me for lunch all week)

1 teaspoon extra virgin olive oil
1 yellow onion roughly chopped
2 cloves of garlic minced

1 teaspoon garam masala
1/2 teaspoon scant cumin
1/4 teaspoon cayenne pepper

1 cup split red lentils (Masoor dal)
Boiling Water 
1/2 cup coconut milk

1 cup quinoa
3 cups steamed vegetables (I used onions, yellow peppers, broccoli, snap peas and carrots and threw in some raw tomatoes)

Start things off by cooking your quinoa with 2 cups of liquid to your one cup of quinoa. I used water and threw in some of this thai seasoning. I use a rice cooker for mine because it is super easy but feel free to use a pot.

Heat the teaspoon of oil in a medium-large pot. Add the onion and garlic once the oil is heated and cook until softened and slightly translucent. 

Add the 3 spices and cook them with the onions for about a minute and a half. Add in the lentils and pour enough boiling water on top the cover the lentils and onions (I just poured water straight from my kettle). Cook this for about 10 minutes before stirring in the coconut milk. Then cook the mixture until the lentils are very soft and it is fairly smooth, about 10 more minutes.

I steamed my vegetables in this beautiful thing. I swear it was created by the Gods. I actually don't remember how I possibly waited more than 3 minutes to cook vegetables. Never will I have to enter that dark stage again! 

Serve this with a bit of quinoa in the bottom of the bowl with vegetables on top then the dal poured over the top. It was an amazing dinner! 

If you are as crazy as I am for coconut milk I suggest you make this ASAP. No time to waste!